Configure Google as Authentication Provider using the SAML2 Protocol
Here are step by step instructions for federating authentication from Cognito to Google using the SAML2 protocol
Google Admin
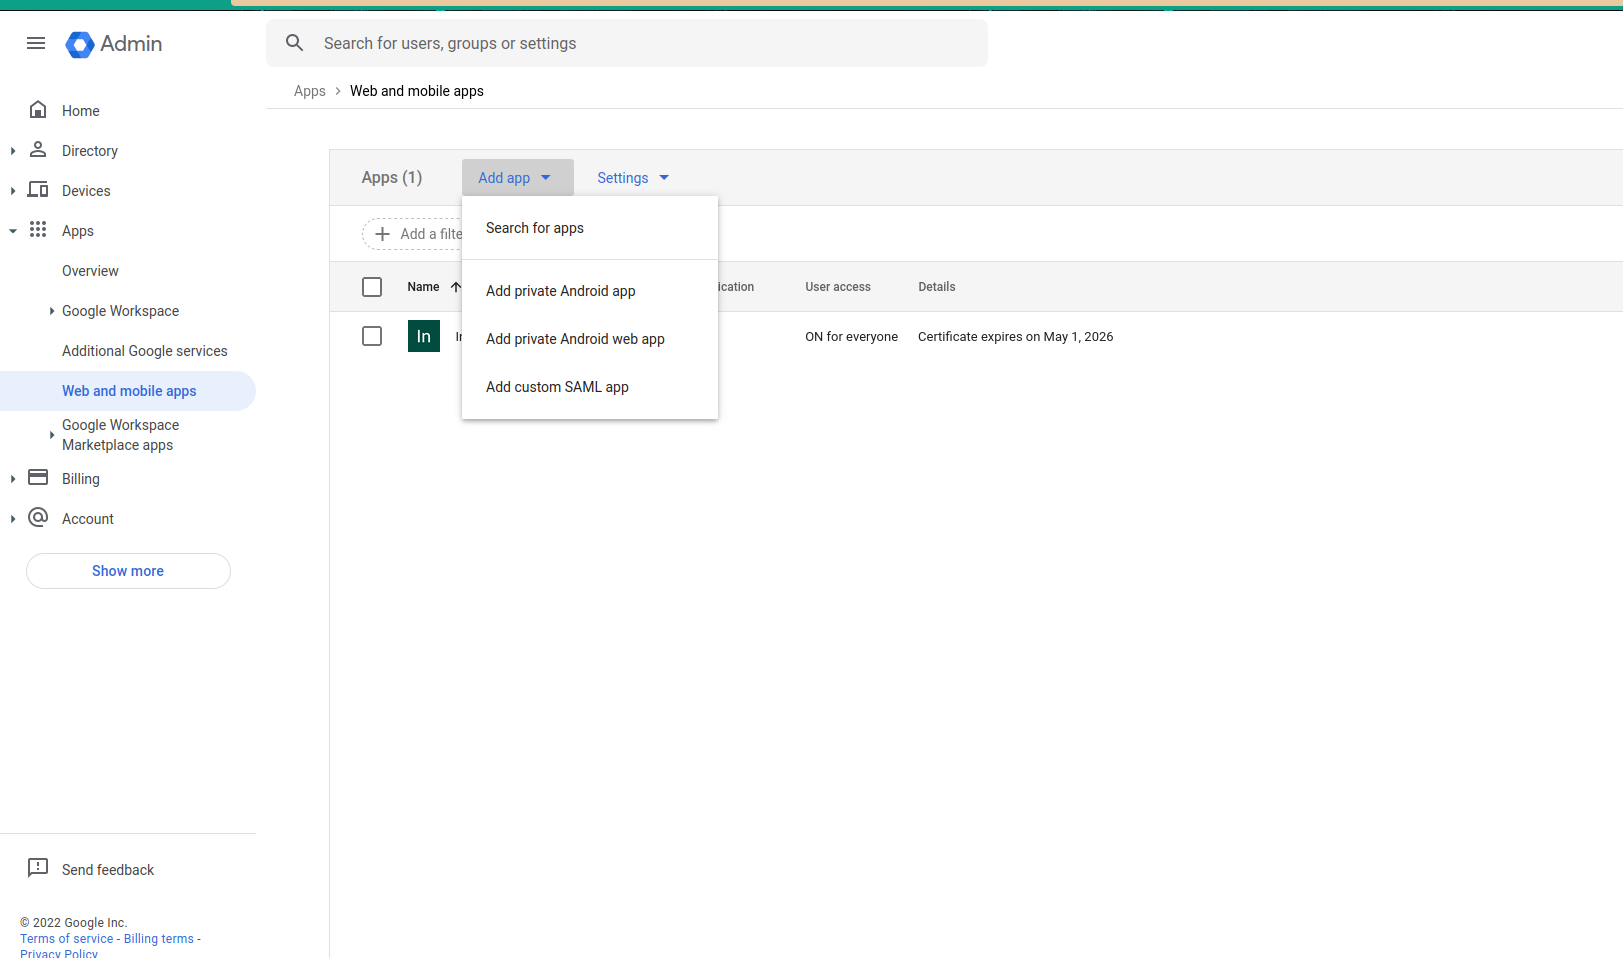
- Login to Google Workspaces as an Admin and bring up the Admin console
- Click on Apps and then clikc on Web and mobile apps
- Click on Add App and then choose Add custom SAML app
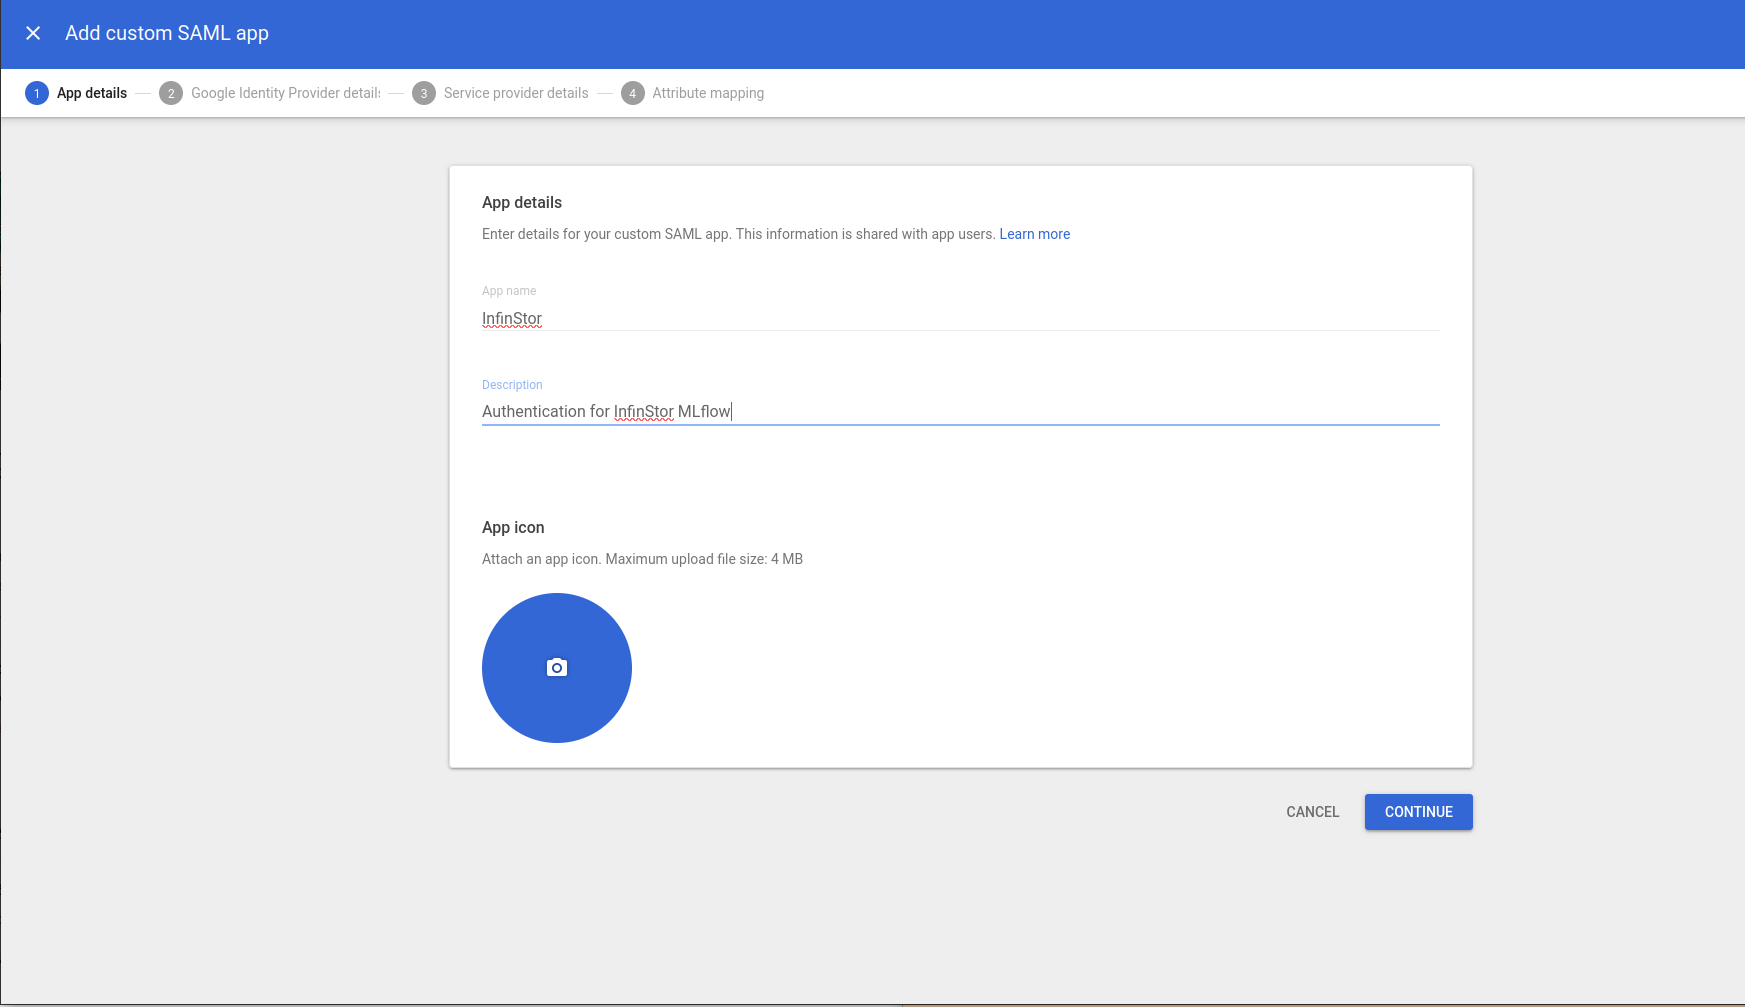
Name the app
Provide a name for the app (e.g. InfinStor) and a description
Download IdP Metadata
Download IdP metadata in the next screen. The download file is likely to be called GoogleIDPMetadata.xml. Click next

ACS URL and Entity ID
Two important configuration items are required here:
ACS URL a.k.a redirect URL
Google calls it ACS URL and AWS Cognito calls it Redirect URL. In any case, this URL is of the format https://your-cognito-domain.auth.aws-region.amazoncognito.com/saml2/idpresponse. For example, a cognito domain service-ai-isstage4.com in region us-east-1 would result in a ACS URL of https://service-ai-isstage4-com.auth.us-east-1.amazoncognito.com/saml2/idpresponse
Entity ID
The Entity ID is of the format urn:amazon:cognito:sp:your-cognito-user-pool-id. For example, if your Cognito User Pool is us-east-1_LzJrxyZzy, then the Entity ID would be urn:amazon:cognito:sp:us-east-1_LzJrxyZzy
Here is an example screen capture:

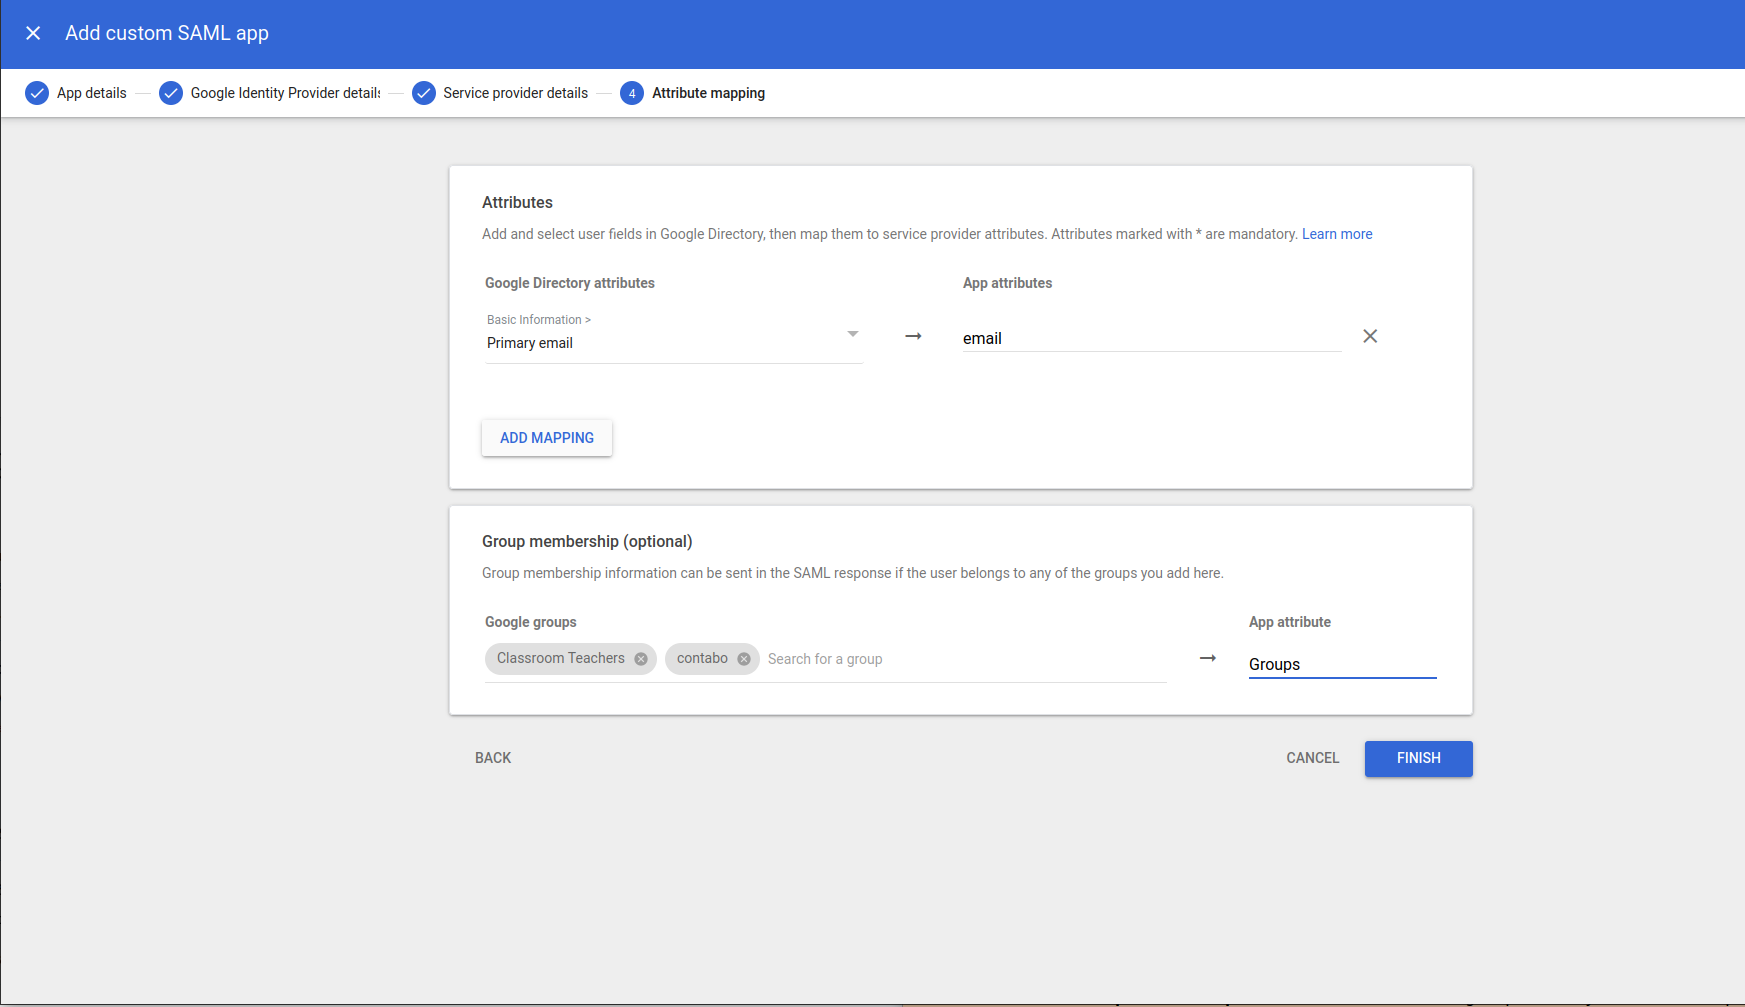
Attribute Mapping
- First, choose Google Directory Attribute Primary email and map it to email
- Next, in the Group membership section, choose the groups that you want to map and map it to an App attribute Groups
Here's a screencapture showing attribute mapping:
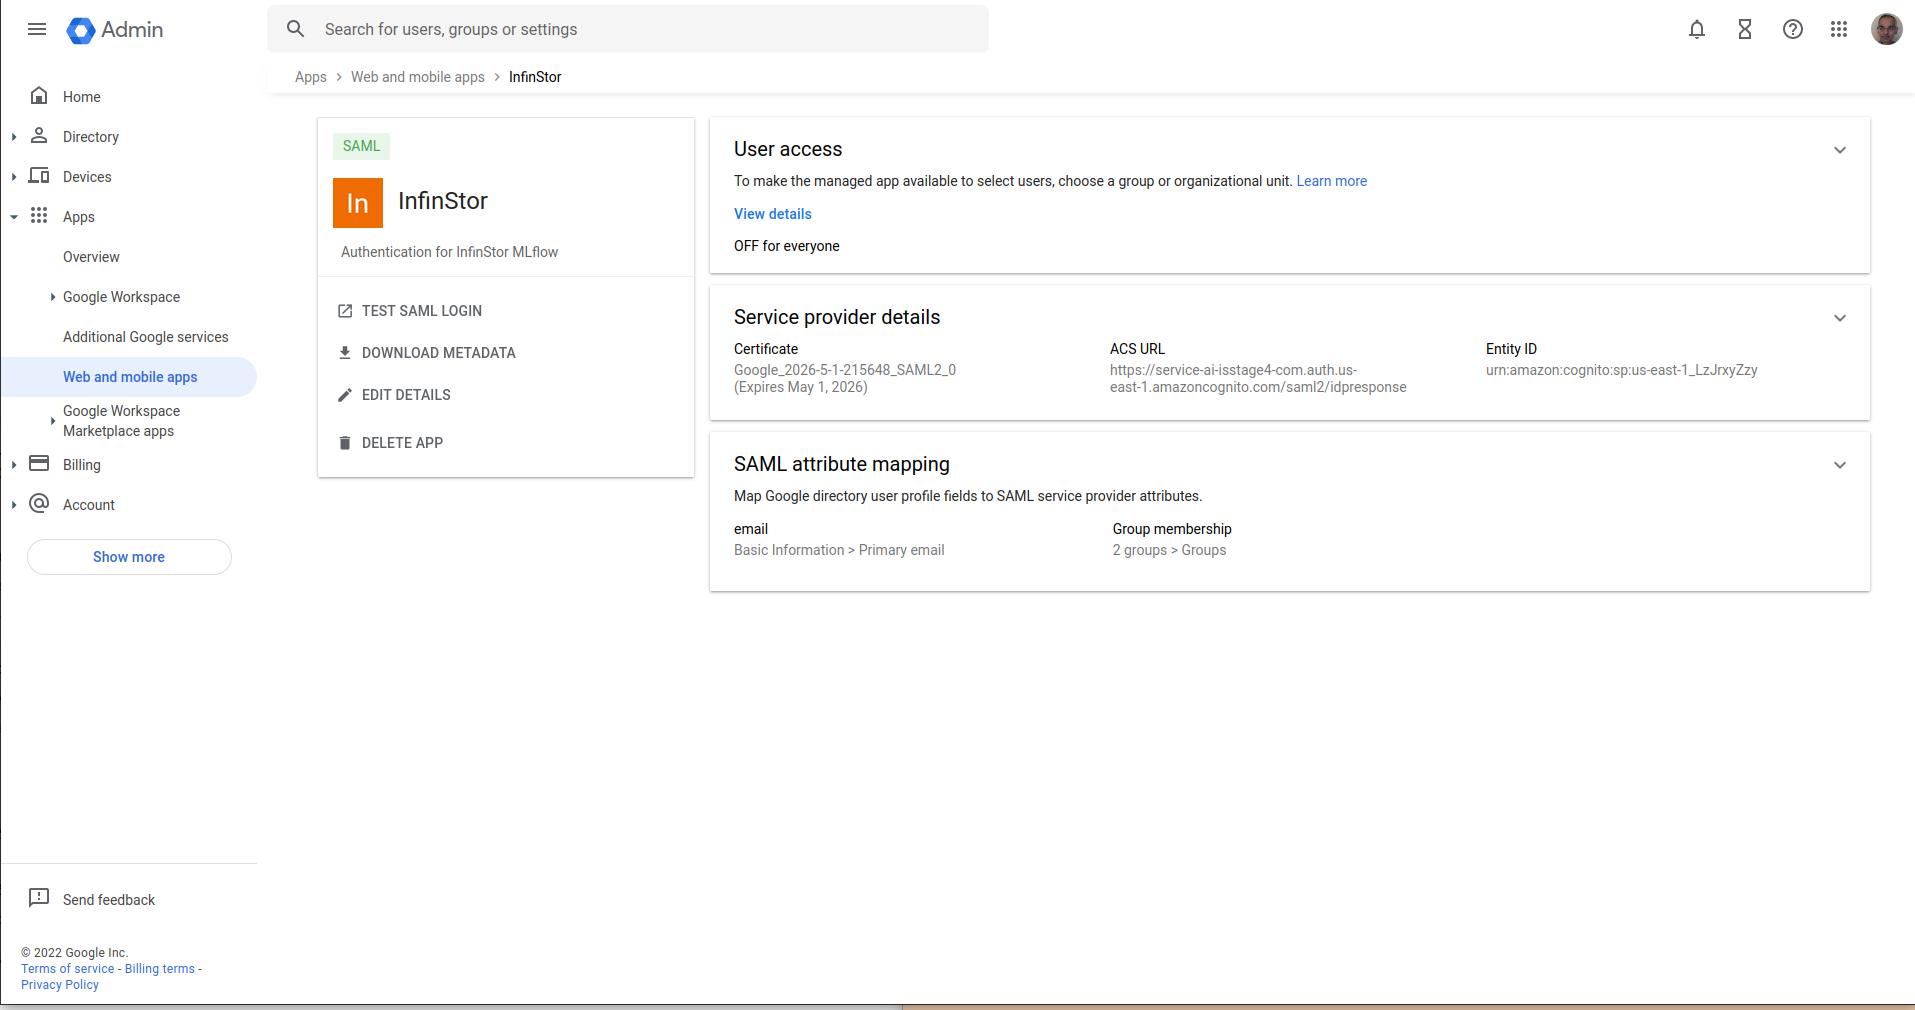
Turn on User Access
Finally, turn on User Access for everyone, or a smaller subset of people. Here's a screen capture showing the summary:
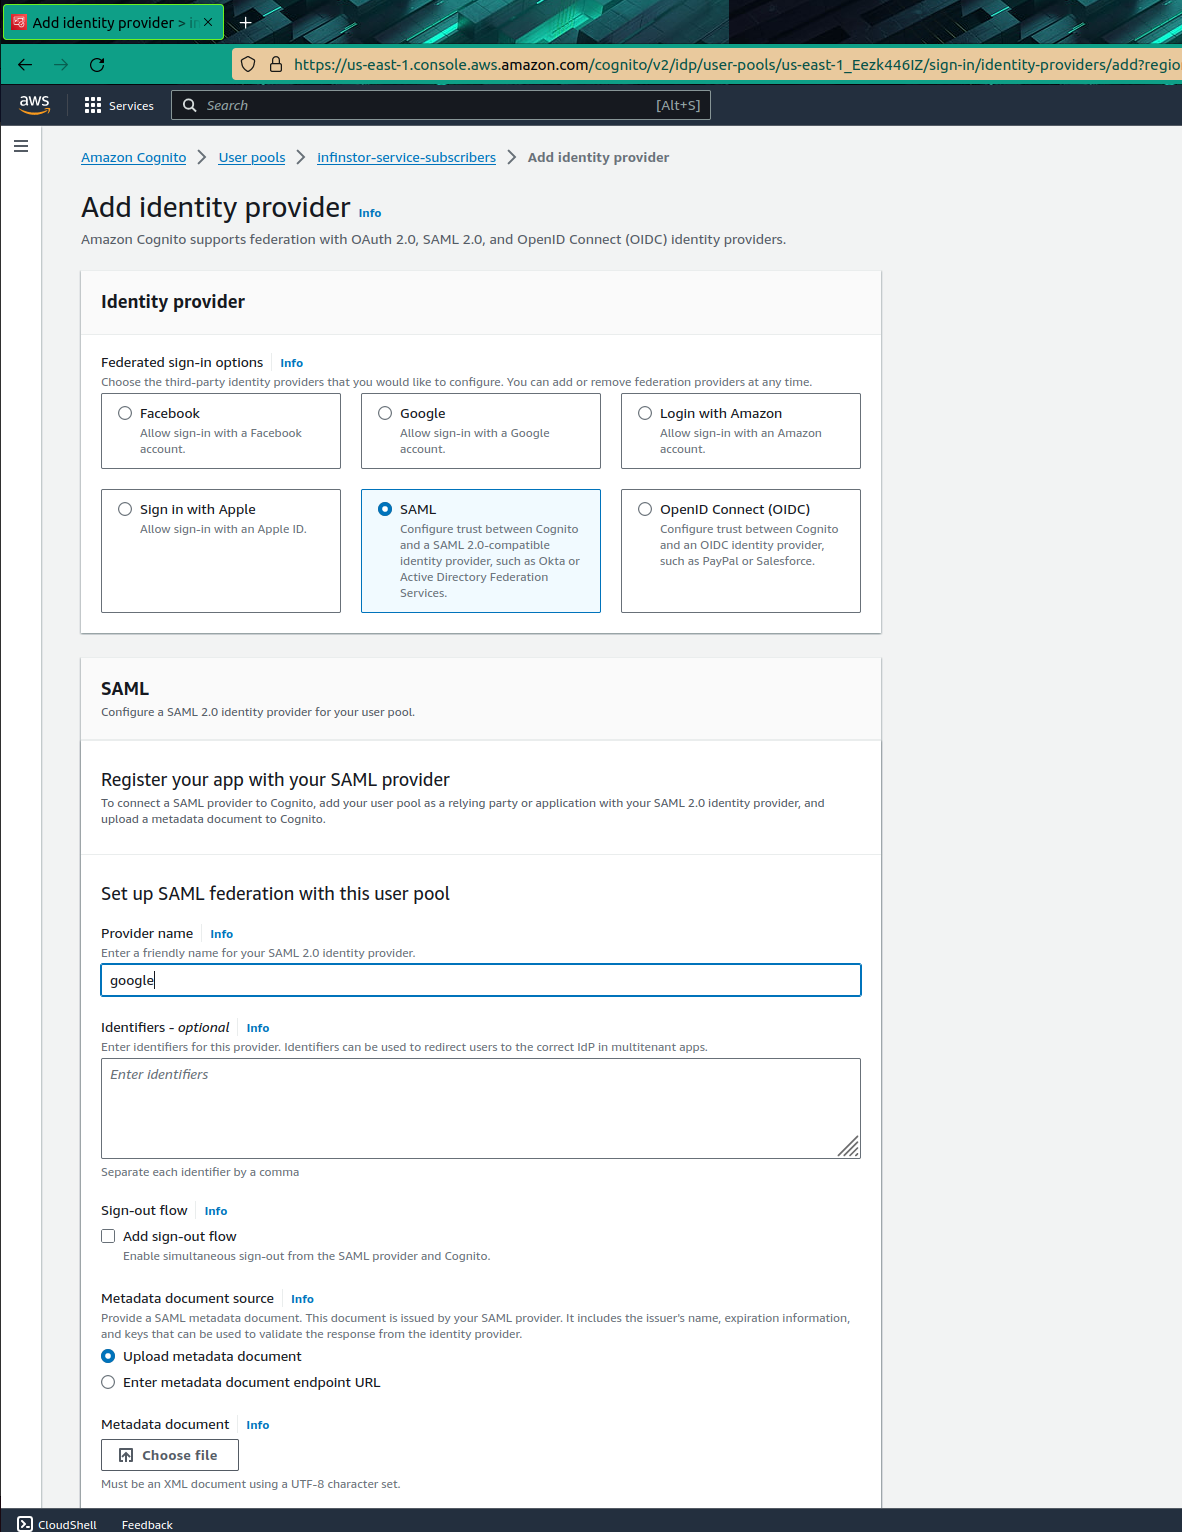
Cognito Configure SAML
Now, let's setup Google as a SAML2 federated authentication provider for our Cognito User Pool
- Go to the Cognito AWS Console and choose the User Pool infinstor-service-subscribers
- Click on Identity Providers and then click on the tab Sign-in experience
- Click on the Add identity provider button in the Federated Identity Providers tab
- Choose Metadata Document and upload the file GoogleIDPMetadata.xml that you downloaded from Google earlier
- Supply a Provider Name. Use a simple one such as google. If you choose the name google and if the user has email address xyz@email.com, then the username composed by Cognito will be google_xyz@email.com
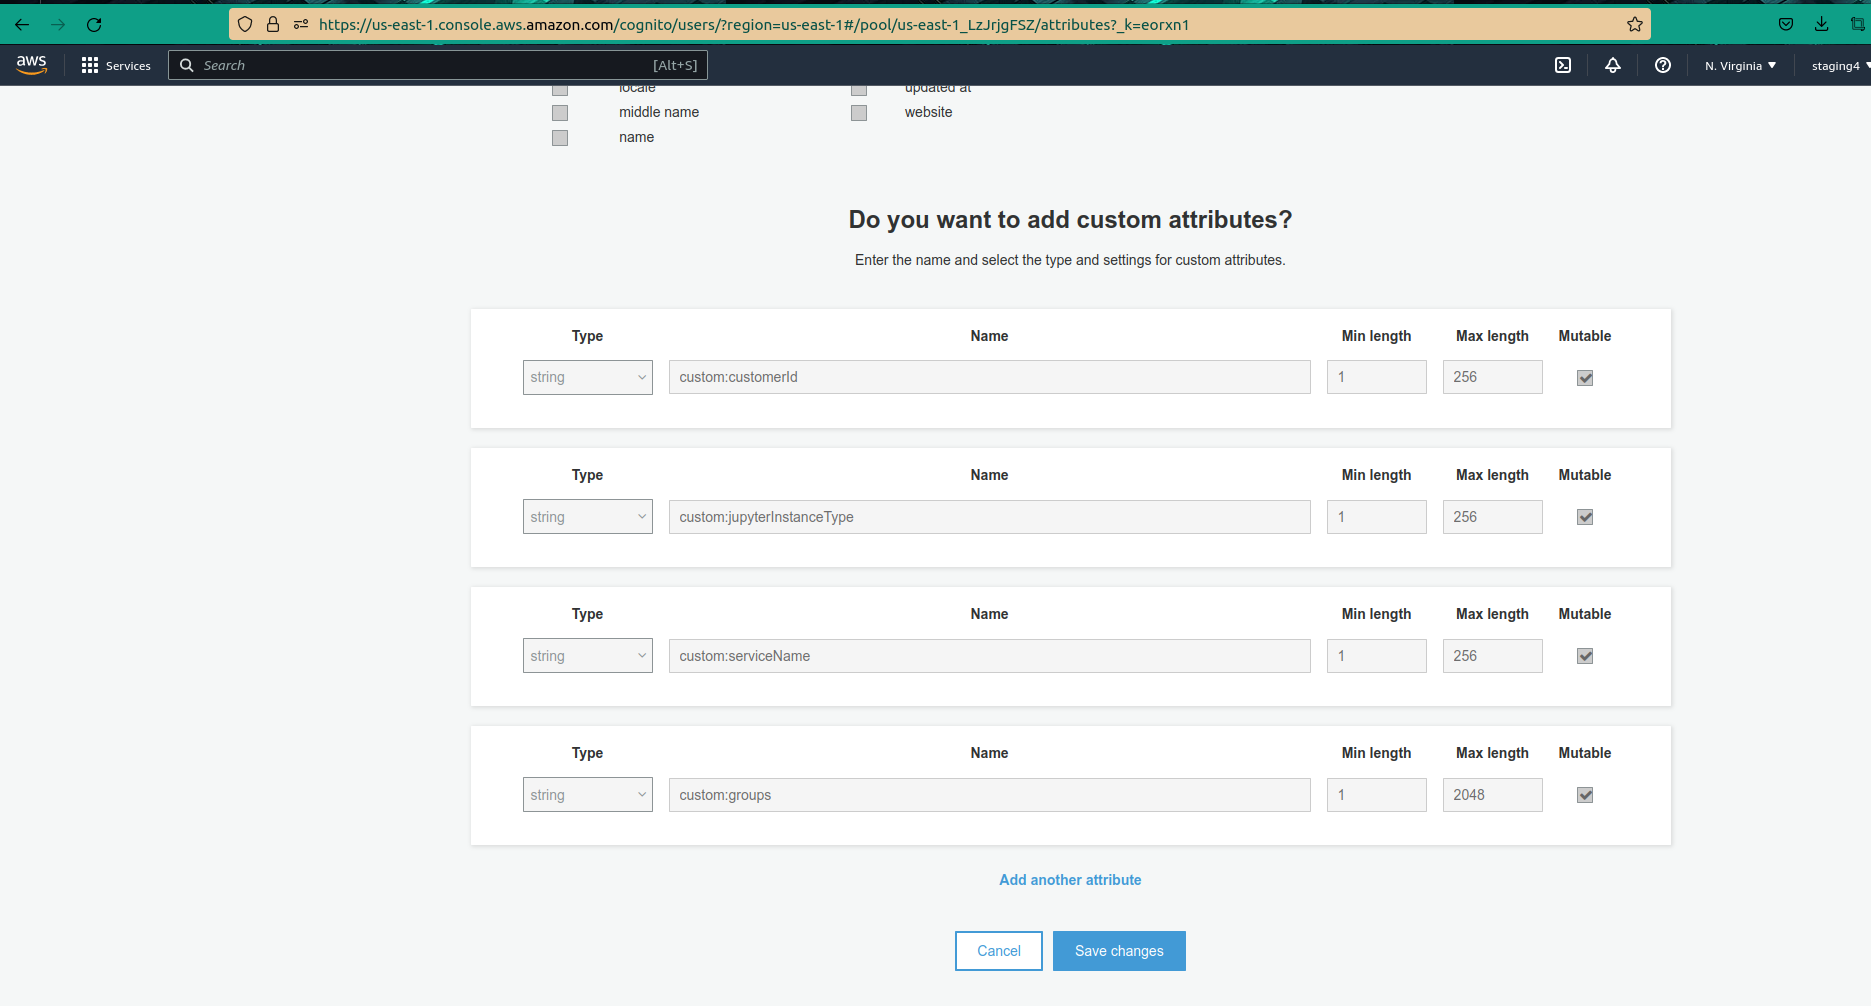
Create new Cognito Custom Attribute custom:groups
Click on Sign-up experience tab and then click on the Add custom attributes button in the Custom attributes section. Then add a string attribute called groups. Note that when adding the attribute you would type in groups, but when Cognito displays it, it shows up as custom:groups as shown in the screen capture below.
Set Attribute Read and Write Permissions for for all app clients
Click on General Settings -> App clients on the left navbar, for each app client, enable read permission for the newly created custom attribute by clicking on the Set attribute read and write permissions
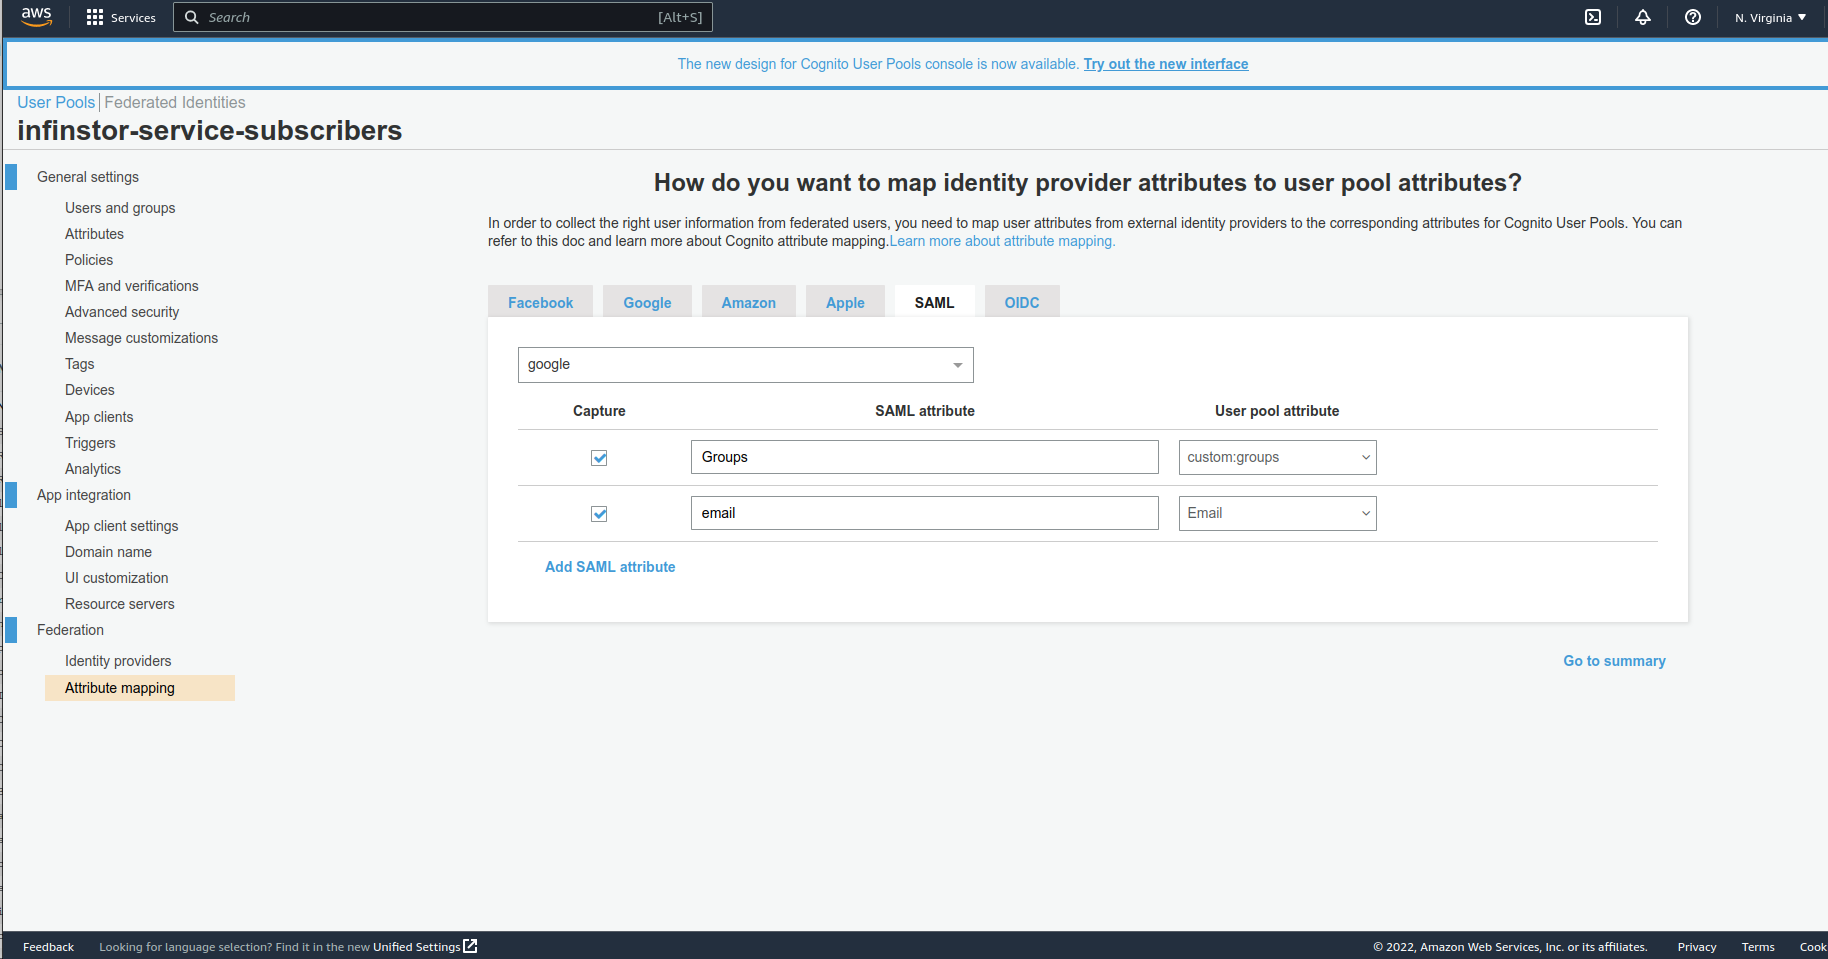
Cognito Custom Attribute Mapping
Next, browse to the Sign-in experience tab, choose the google provider, and then choose Attribute Mapping to setup attribute mappings:
- User pool attribute email to SAML attribute Email
- User pool attribute custom:groups to SAML attribute Groups
Here's a screen capture showing cognito custom attribute mapping
Enable Identity Provider google for all app clients
InfinStor creates app clients named mlflowui-client, web-client, jupyterhub-full-client and cli-client
Enable this new identity provider google for each of these clients by clicking on the App Integration tab, then choosing each app client, clicking on the Edit button of the Hosted UI section.
Finally, delete the Cognito auto created group your_pool_id_google
When you add an SAML provider, Cognito automatically adds a group named your_pool_id_google. All users from this authenticatino mechanism belong to this group, making it mostly useless. Delete this group.