1. Configure Direct Azure Active Directory
Here is an example of creating an Azure App Registration for InfinStor MLflow service.
1.1. Azure Portal - App Registrations
Login to the azure portal https://portal.azure.com/ and click on App Registrations and then New Registration
1.2. App Registrations - Register an application
Provide a name for your App Registration. In this example, we have used auth-for-ml-isdemo1. Every other field is default
1.3. App Registrations - Summary - Directory ID, Client ID
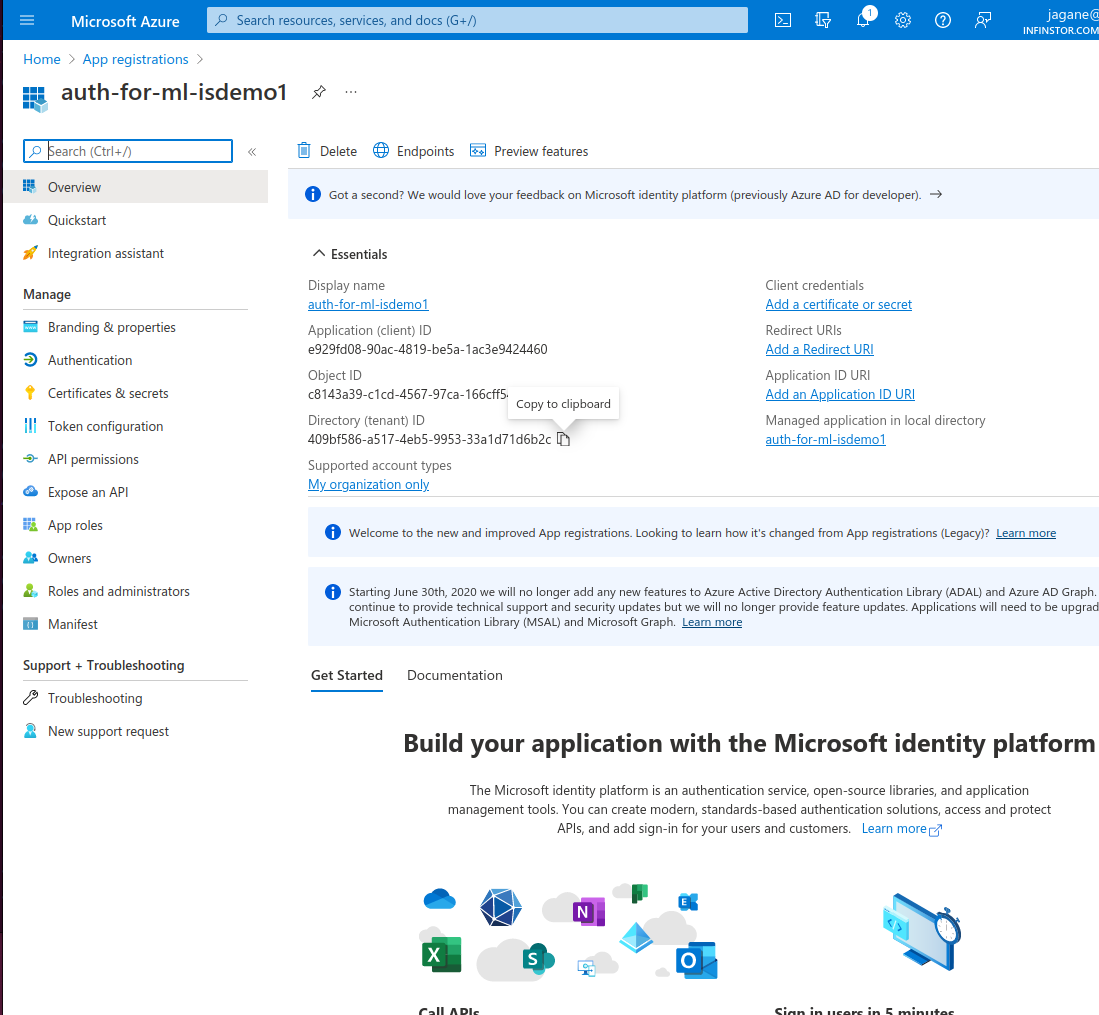
After creating the App Registration by clicking on the Register button, you will be taken to the summary page. Note the Directory ID and the Applicaiton(client) ID. The following two screen captures show you these values.
1.4. App Registrations - Add Platform
Click on 'Authentication' on the left and then 'Add a platform' button in the summary page for the App Registration
1.5. App Registrations - Choose Platform Type SPA
Click on the 'Single-page application' in the platform type
1.6. App Registrations - Configure first SPA Redirect URL
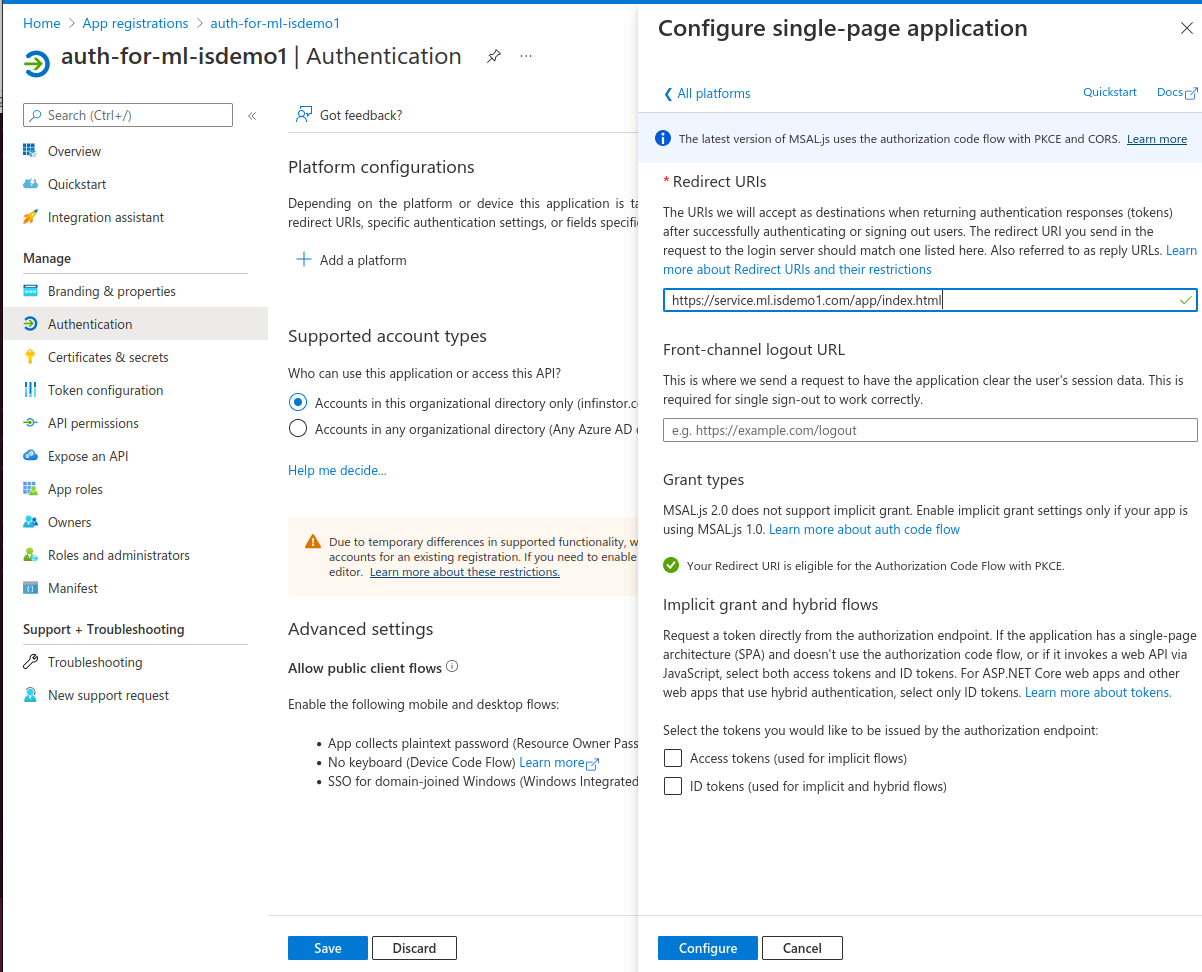
InfinStor MLflow uses two redirect URLs. The first one is configured here. The format is
https://service.
In the example below, we are deploying to service domain ml.isdemo1.com and hence the full URL is https://service.ml.isdemo1.com/app/index.html
1.7. App Registrations - Configure second SPA Redirect URL
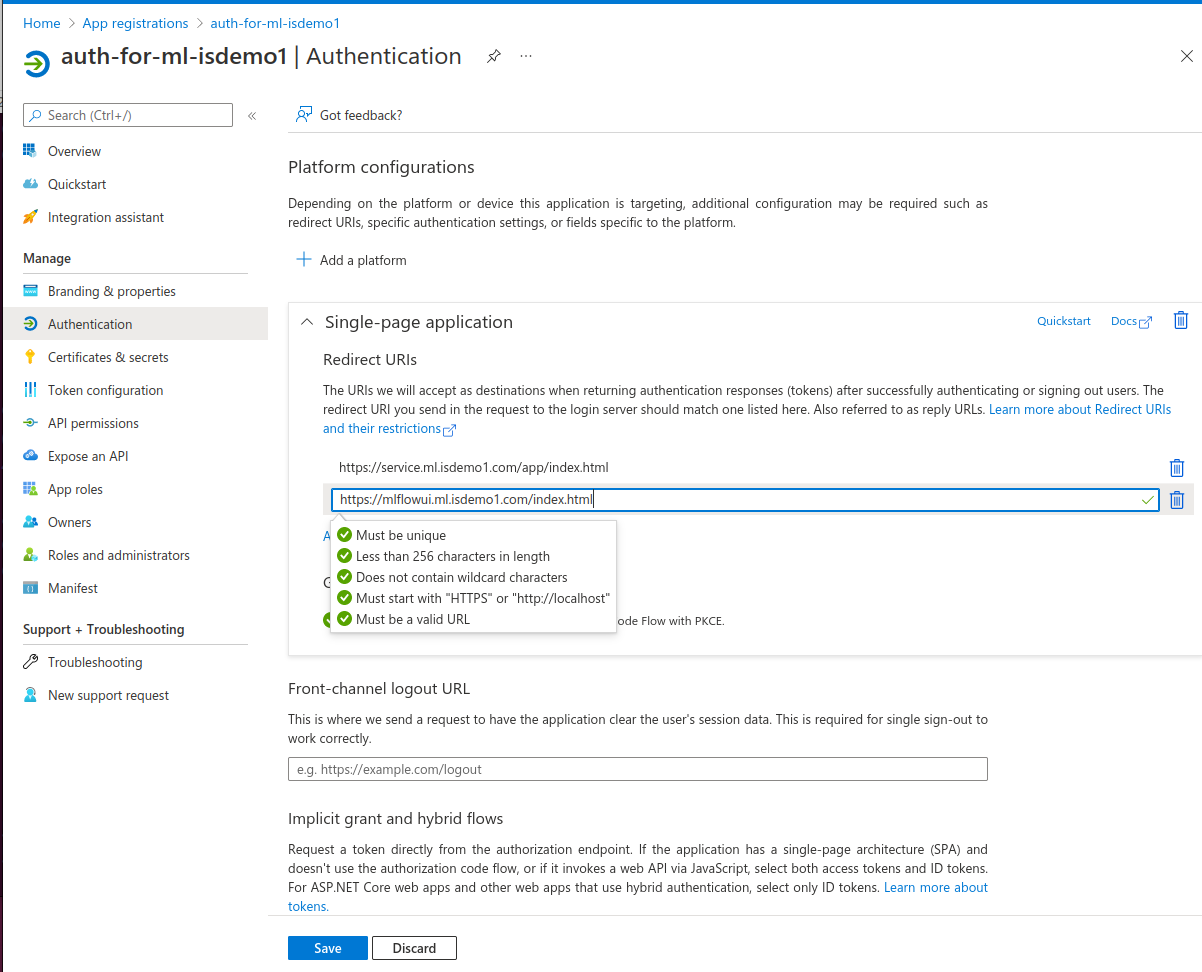
InfinStor MLflow uses two redirect URLs. The second one is configured here. The format is
https://mlflowui.
In the example below, we are deploying to service domain ml.isdemo1.com and hence the full URL is https://mlflowui.ml.isdemo1.com/app/index.html
Click on Add URI in the Single Page Application configuration page.
1.8. Add users and groups to the App Registration
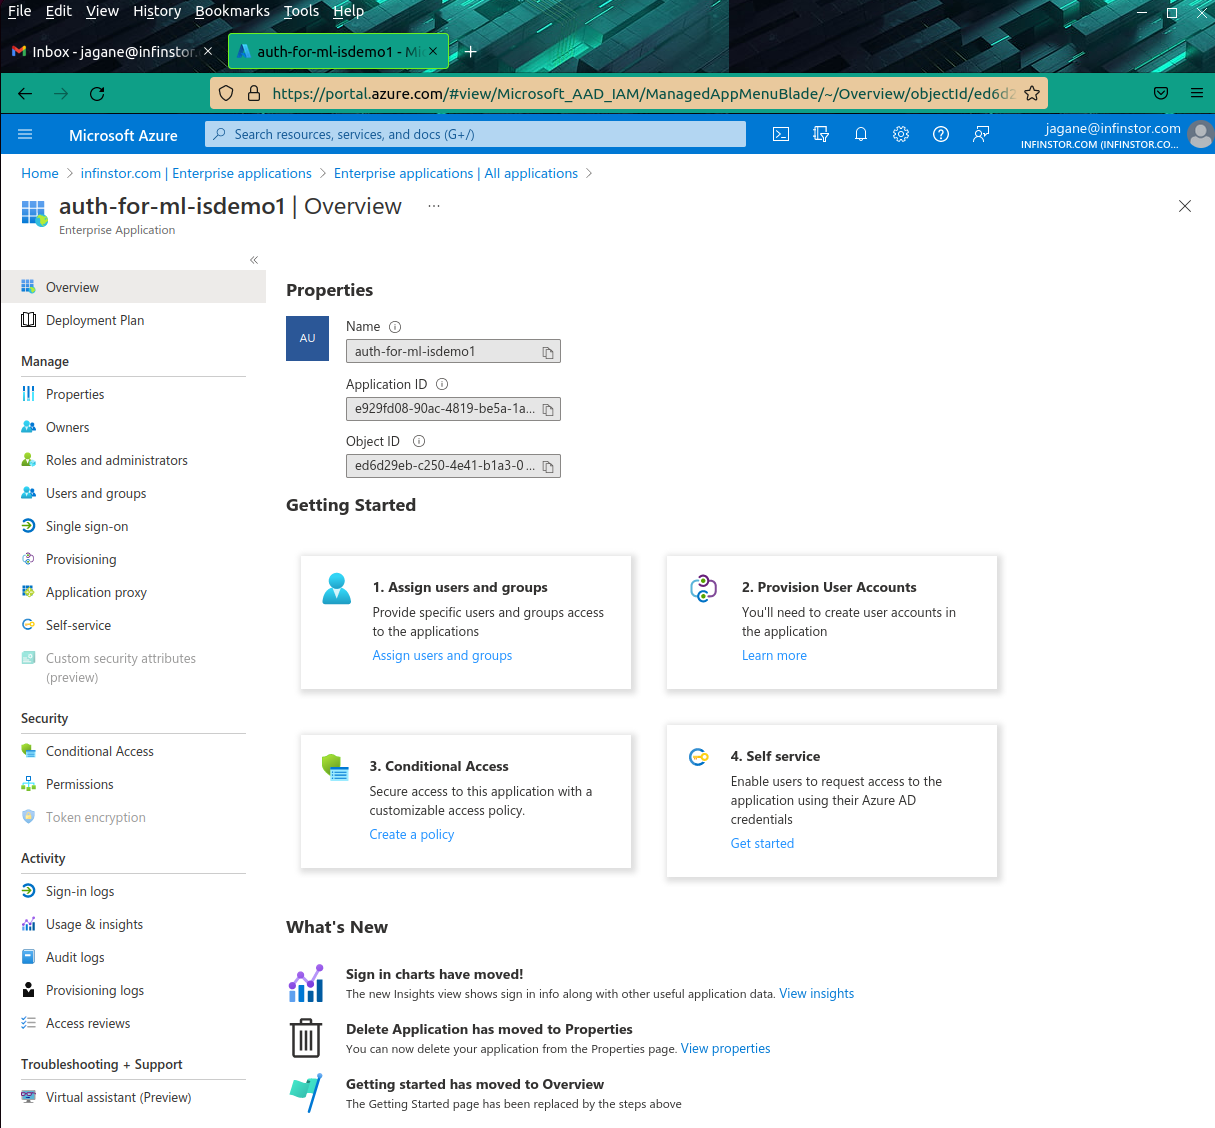
The final step is to add users and groups from your Enterprise to the App Registration. This is accomplished from the Active Directory page. Click on Active Directory in the Azure Portal's main page and then click on the Enterprise Applications in the sidebar. You will find your App Registration listed here as well. In this example, we will find an entry for auth-for-ml-isdemo1. Click on this entry.
Click on the Assign Users and Groups button and you will be taken to the page where you can add users and groups. Click on + Add user/group in this page


